Showing posts with label display. Show all posts

Sunday, July 15, 2018

Minor update on the Table

The dice trays looked great, but the attachment method I used wasn't that strong; small wood screws from underneath that only went partway into the top sheet of plywood. One of them popped loose with only slight pressure. So I got some brass "furniture connectors" and hex nuts. The tops of the connectors are visible on the table's surface, but look pretty nice, actually.


NOW I think I am done!

Thursday, July 12, 2018

Table: Final Assembly!

(warning: image heavy!)

While technically not 100% done, the pieces are all in place. I just need to fine tune the cable management under the table and screw down the top panel.

First off, I attached the legs to the base:

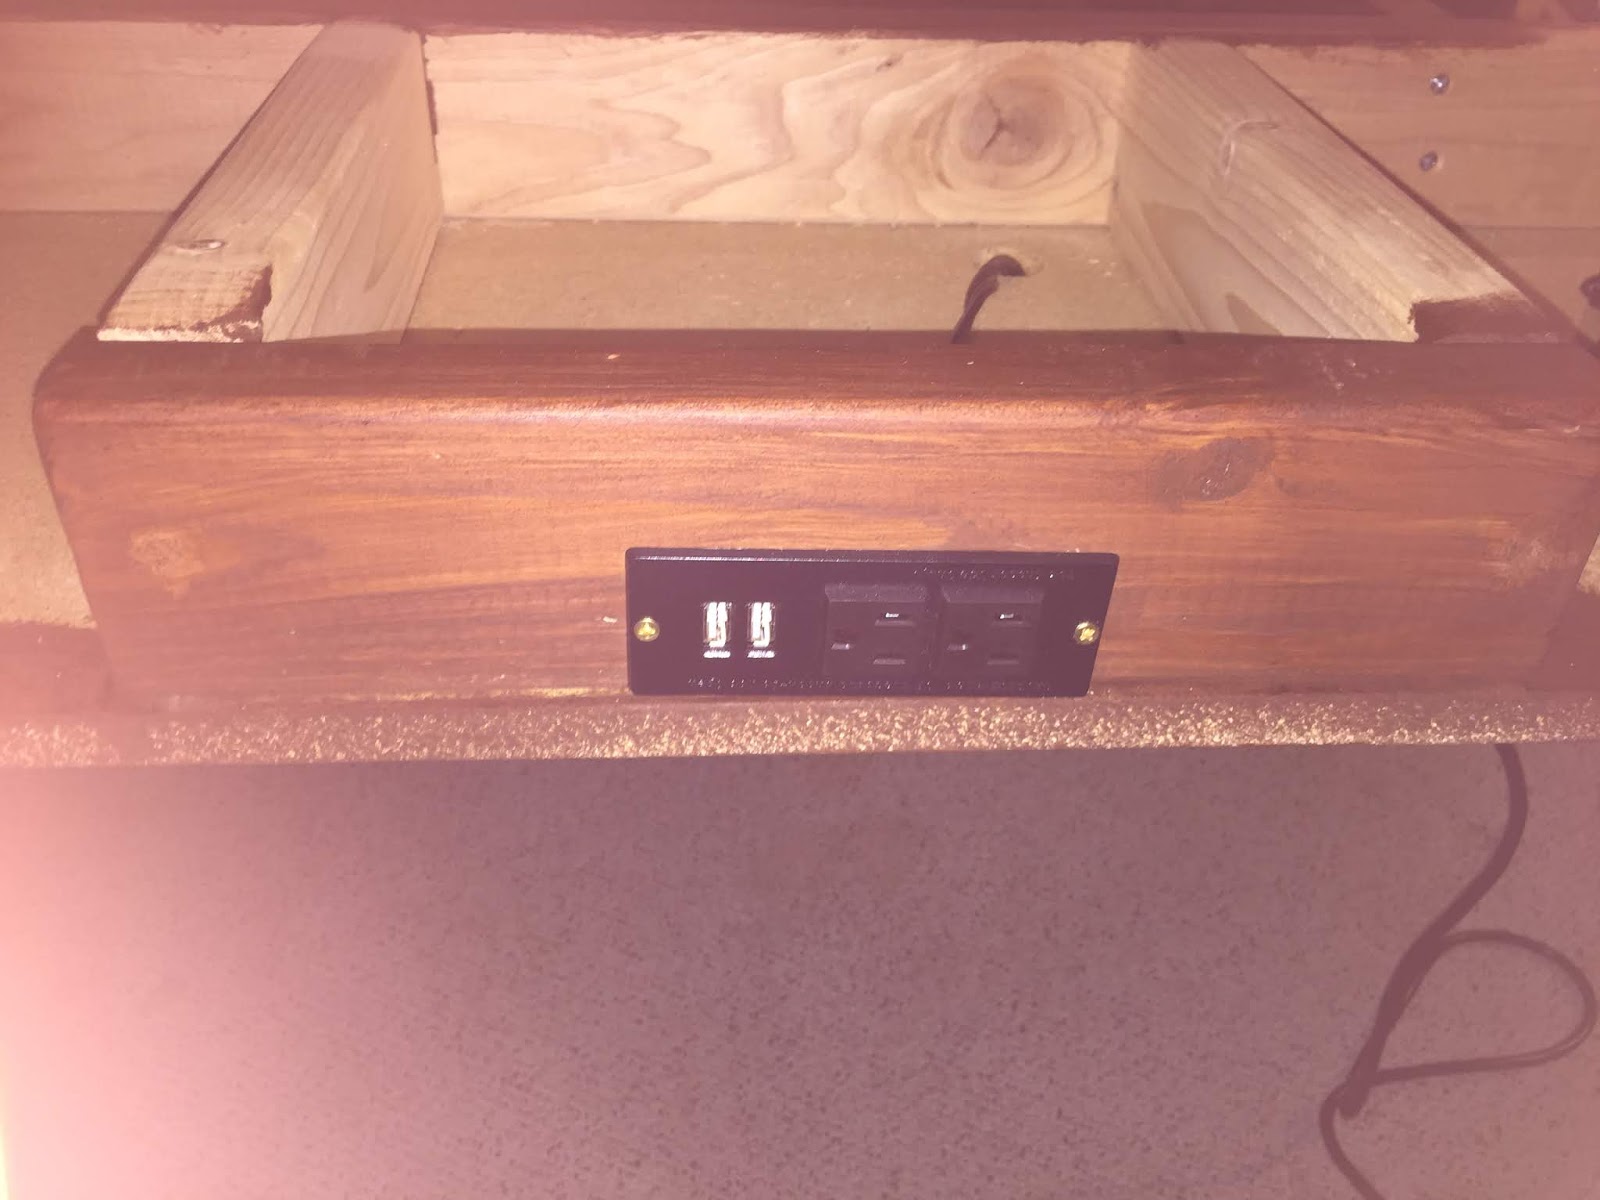
Next up, I put in the outlets, Chromebox, and the TV screen:


The screen had to be raised up a little in the frame, but that wasn't too hard to do. I just used some piece of spare wood as blocks under the TV. I was disconcerted to find that the frame that's holding the screen is slightly off level (not sure how/when that happened) but the screen itself is flat.

The audio speakers are just held face up via a quick & dirty cardboard frame that steadies them in that position. I didn't want to fasten them down permanently in case they needed troubleshooting or replacing.

Once the outlet plates were screwed in, I installed the power strip on the underside of the base and plugged stuff in. When I was sure all the plugs worked, I fired up the TV and Chromebox for a test.


I swear I "dry-fitted" the wood panel that covers the screen opening, but it didn't want to drop in all the way. So a little sanding of the edges later and it was passable. I'll need to re-stain those parts, though.


You can see the grills I installed above the speakers. They are just cosmetic. I'm using the speakers down at the DM end of the table instead of the TV's audio so that the output is far enough from the far end's microphone so as to avoid feedback. 

Finally I placed the top panel on. I also re-cut the old sheet of Plexiglas from the tabletop frame to size. It's not perfect, but it fits. It cracked at the corners when I screwed it down (even with starter holes), so I may end up replacing it. Cupholders were dropped into place and you can see what the final product looks like. 


(the little 'dot' in front of the TV panel is the microphone)

Lessons learned:

The main thing is that I am not a master builder! There are a half dozen or so small-to-large errors in the construction that bug me. Most are minor cosmetics and/or fixable, but I'm sure they could have been avoided with more care or skill. There are things like minor gaps or poor fits or edges that are not quite true that irk me. I tend to get overenthusiastic about projects and rush things.

One thing I plan to change is that the table seems a little low. It is usable, but I am going to get some large casters for the table legs to make it easier to move and raise it up an inch or so. On paper the dimension seemed ample, but looking at it assembled, I worry it may be a little small. Of course, that's why I added the "cubbies" for people's books, to save tabletop space. Another is that the magnets that are supposed to secure the panel that covers the Chromebox. It's okay the way it is, but not as stable as I hoped. I think I just need to use slightly bigger magnets.

Once the top is screwed in place, I'm going to test the Roll20 maps and maybe have someone log in remotely while someone else sits at the table with me. We'll try out the sound pickup and the whole virtual tabletop/face to face hybrid gaming and see if that works as well as I think it should.

There are a few things in the gaming area of the basement that are non-table related that still need to get dealt with before people can come over and really game, but it's highly satisfying to have this done(ish), warts and all.

Sunday, July 1, 2018

Table WIP: Home Stretch

All the staining is done. I also put two coats of clear polyurethane on the tabletop and panels. At this point, once the basement is clear, I can take the pieces down and start final assembly.

Monday, June 25, 2018

Table WIP: Part something. Staining

The table legs got stained about a week ago, but weather and schedules made more work impractical for the last several days.

This afternoon after work was gorgeous, so I took the top and the panels out to work on. The base was too heavy to move on my own and I lacked my normal beautiful assistant (my wife).
I'm using a Minwax chestnut that is stain + polyurethane in one.  

The little finger hole in the corner of the display cover is to let me lift it out of the opening more easily. The smaller panel (top) will cover the Chromebox section.


There is some work unrelated to the table that has to happen in the basement before final assembly occurs. But I am getting closer!

Friday, June 15, 2018

Table WIP: Getting There

The top of the table has been cut and sanded. I also cut and assembled the table legs yesterday.


The large circular holes will be dice-rolling trays. The medium holes are for the cup holders. The center holes is for the TV screen. The two small round holes are for the speakers. The big corner cut out is for the "access panel" to reach the ChromeBox inside the table. It runs the TV display. 

There is also a tiny hole on the far side of the TV from the speakers. It will hold a small USB mic for sound pickup that will hopefully allow anyone playing remotely via Roll20 to hear the other players. There is another small mic attached to my laptop that will be at the "DM side" of the table (corner across from the Chromebox). Hopefully the mics will be far enough from each other the speakers to avoid feedback (The TV sound will be muted).


I meant to glue the table leg pieces together as well as using the wood screws, but I forgot. Each leg is held together by three screws, so they are pretty secure. I still need to drill the holes for the securing lag bolts into the frame and the legs. There will be two per leg. 

If the weather holds, I will stain the table this weekend. Then I will be able to run the wires for the outlets, etc. and attach the tabletop to the frame. The legs won't get attached until I can bring it inside and down to the basement.

Monday, June 11, 2018

Some progress

I managed to complete the framing of the 2x4s this weekend and cut the holes for the cables. I also marked out where I need to cut through the top piece of wood for the TV screen. etc. I bought the stain and I had to get some more 2x4 for the table legs. If I can get 2-3 more sunny days, I can finish this thing off. At least the parts that need to be done outside.

Sunday, May 27, 2018

Table WIP, Part 2: Layout

Another sunny day. A little more work done. The short pieces around the edge are not attached yet. The cross beams by the TV frame are screwed in. I also cut holes for attaching the table legs, but I later realized they'll need to be a little bigger.


The stuff lying about the table is me trying to make sure things will fit where I want the. The cookie tin is standing in as the template for cut-in dice rolling trays. You can also see the cup holders, speakers, and the power outlets.


The Chromebox will run the player-view Roll20 interface on the TV screen. You can't see very well in this shot, but I drilled several "vents" into the board underneath for airflow purposes.

Monday, May 21, 2018

Table WIP pics, part the first

The sun finally came out, and my wife & I had a chance o do a bit of work on the table.


The frame is to hold the TV screen. The particle board will be the bottom layer of the table itself. I wanted the screen slightly offset from center to give the "DM's end" a little more room. We then traced where to cut an opening for the frame.


Once the hole was cut, we put he frame inside. It was a pretty tight fit, but that's good! The, because particle board doesn't have a lot of structural strength, we glued and screwed two 2x4's on either side. these will also be part of the frame that holds the top layer up and divides up the 'cubbies' that the players can use for books, etc. 

At this point in the afternoon, we need to let the wood glue dry and there was food to cook and children to ferry to activities. The next steps should go fairly quickly, as we'll just be cutting and attaching lengths of 2x4's to complete the framing. After that, we'll work on the top of the horizontal surface. I also need to cut out the corners of the particle board to make room for the table legs.

Friday, May 18, 2018

Rain, rain, go away


I haven't forgotten about posting WIP pics. Progress on the table has stalled because it will simply NOT. STOP. RAINING.

Monday, April 23, 2018

Some movement

The ebay auctions are done. I've got about $250 to spend on the in-screen table construction. The power tools have arrived as well.

I also ordered a LED photo tent so I can take some better pictures of minis if and when I finish any! Maybe I will try it out on the bugbear I finished at the painting club.

Monday, March 26, 2018

eBay funding a new project.

Long time, no post!

I haven't painted a lot recently. Frankly, part of it is my eyesight. I have had a harder time seeing the details up close. So a trip to the eye doctor is scheduled for later this week and I will likely get new spectacles.


There is a project that I wish to do as well. In fact, it's one of the reasons I am eBaying a bunch of Bones minis.

A while back, I posted about an LED screen tabletop frame I built for minis and maps. I have wanted to upgrade this to a new gaming table with the screen flush and embedded in the surface. You can see an example of this kind of table in this video. I probably won't make this exact configuration, but it's the same idea.

My hope is to make enough scratch to buy the materials and maybe even upgrade a few power tools I could use for the project. The auctions end over Easter weekend, so even if I make enough cash for everything I probably will not actually get to buy stuff and/or work on the table until at least the following weekend.

Sunday, August 21, 2016

Not a mini, but more tabletop fun


I put this bad boy together this weekend in a frenzy of project madness. It's a 32" LED HDTV set horizontally in a wooden frame (basically 2x4s) and covered with plexiglass. There is a Chromebox PC with wifi hooked to the back with a wireless keyboard and mouse. The system can then log into Roll20 and display the player's view of the dungeon map, etc. The GM runs the session maps from a laptop. Physical minis/tokens can then be placed on the plexiglass and moved about without scratching the screen.